My family leads a very busy life, with most mornings (especially Sundays) permitting only a brief time to prepare breakfast. I really wanted something that could be prepared ahead of time, but available over the long term.
That's when I discovered breakfast burritos! I picked up the recipe from a friend and have slightly adapted it to our tastes.
Breakfast Burritos
Serves 16
Ingredients:
1) Package of flour tortillas (whole wheat in packages of 16 work best. The WW stretch further than the white or corn)
2) 1-dozen eggs
3) 1-package of freezer hash-browns (for those who like peppers and onions pick up the O'Brien potatoes)
4) 1lb loose breakfast sausage [OPTIONAL}
5) 1lb Shredded Cheddar Cheese
6) 16 oz of taco Sauce (I prefer Ortega Mild Original Thick and Smooth) [OPTIONAL]
Directions:
1. Bring tortillas to room temperature.
2. Meanwhile cook breakfast sausage. Then remove to large bowl.
3. Cook hash-browns per package directions. (I sometimes add taco seasoning to the hash-browns, especially if I do not use the O'Brien potatoes). Then remove to large bowl stir together with sausage.
4. Scramble the eggs. Then remove to large bowl and mix with sausage and hash-browns.
5. Add cheese and taco sauce to egg/sausage/potato mix.
6. Stir together.
7. Scoop spoonful of mix into each open tortilla.
8. Roll tortilla and wrap in parchment paper, wax paper or freezer paper. Seal in freezer paper or foil. Store in Ziploc bag in freezer.
Once frozen they can be served individually after 1-2 minutes in the microwave.
**Notes:
- I have discovered that while the burritos microwave well in parchment paper they do NOT in wax paper or freezer paper. If you wish to use one of the latter two then be sure to remove burrito from the paper and place on a plate before microwaving.
- I've adapted the recipe to add fresh cilantro, black olives, beans, pretty much anything you'd serve in tacos or burritos.
Wednesday, January 12, 2011

Thursday, December 16, 2010
The Cranberry, not just a relish
 The cranberry. Because of it's nutrient and antioxidant qualities it is considered by food experts to be one of the "super fruits" yet for most people it brings to mind Thanksgiving or Christmas dinner. Generally it is served as fresh cranberry relish, or even more commonly as a relish from a can. Of course you can always find it in the juice form and in most stores as a dried berry in the same aisle that raisins and prunes are stored.
Until a couple years ago I never really gave this berry much thought outside these two holidays. So when I went hunting for a bag of fresh berries in February I was shocked to discover that stores only sell them in their fresh state for only two months of the year. (In my area from late October/early November until the end of December.) Apparently there is not enough demand for fresh berries outside of these two months so cranberry farmers put the majority of their produce into the form of canned berries, dried berries, and juice that can be bought 12 months a year.
Because of this I was left with the choice of canned berries or dried berries for my recipe. I was disappointed, but in the end the dried worked out fairly well. Still, I determined to buy up some extra bags the following November and freeze them for use later in the new year. The berries left in their bags freeze well and can be used later in all sorts of recipes or even as fresh cranberry relish.
The following are two recipes that call for fresh cranberries. (Note: you could substitute dried, but the fresh is preferred.) They are favorites in our home and I encourage you to pick up a couple bags of fresh berries now, even if you don't plan to try the recipes for a couple months. The berries will last up to (or even a little over) a year in your freezer.
Cranberry Or
 ange Bread
I found this recipe at AllRecipes.com. Since it isn't my own and I've done little to adapt it I have linked the name to the recipe. Be sure to check it out and print off a copy for your own files.
My thoughts: Every Christmas I try to bake some sort of seasonal bread to share with our neighbors and friends. The last several years I have made a family favorite, Lemon Bread, but this year I decided to try something different. Since I still had two bags of cranberries in the freezer I went hunting for a cranberry bread recipe. There are several, but this one seemed the easiest. It turned out well and went fast, so I ended up making a second batch.
Notes regarding the recipe: The recipe calls for 1 cup of cranberries. Each bag of cranberries from the store contains approximately 4 cups, so to save time I just multiplied everything in the recipe by four. This required a large bowl, but ended up giving me 10 small loafs of bread, perfect for sharing. If you decide to double, triple or quadruple the recipe be sure to use a stand mixer, not a hand mixer or a spoon. The batter gets thick and sticky, which makes it difficult to stir. Although the batter is thick it cooks into a light, fluffy, sweet yet tart bread.
I omitted the walnuts, not so much because people aren't crazy about nuts (or have allergies), but because I didn't have any on hand. I noted that it is also possible to make this recipe gluten free so long as the cook substitutes gluten-free flour for the regular flour.
 Braised Brisket with Cranberries
This is another favorite recipe of mine. It's such a delicious meal on a cold winter evening (or Sunday dinner), but since cranberries are not available past New Years it tends to be a recipe you can only make in November or December... Unless you freeze your berries! (This recipe is the reason I started buying up and freezing cranberries, it's that good.)It makes a lot of food, so it's perfect for serving when we entertain company. I love the mix of flavors - the tartness of the cranberries, the richness of the beef and the tang of the onions. I found this recipe a few years ago in Martha Stewart's Everyday Food magazine.
My Thoughts: I do not have a big enough pot that can be used on the stove burner AND in the oven, so I had to move the meat from one pot to another, but otherwise this recipe was fairly simple. It takes a while to cook, but it smells so good and is so delicious that it is worth the wait.
Note: I prefer to use a bag of frozen pearl onions, but not all stores sell them -- or if they do, they sell them seasonally. Like the cranberries you may have to plan ahead and purchase the frozen onions earlier than when you plan to use the recipe. However, when frozen pearl onions are not available you should be able to find fresh pearl onions. The fresh require a little more work (i.e. pealing), but work just as well.
For those who prefer not to use drinking wine in their cooking you could substitute cooking wine, or vegetable/chicken broth (though this may slightly change the overall taste of the recipe).
Friday, December 03, 2010
Killer Leftover Turkey Soup
 Got leftover turkey? Unclogged arteries? A yearning for tasty-but-bad-for-you soup?
Then try the soup recipe I invented to use up leftover turkey!
TURKEY BACON CHEDDAR SOUP
5-6 pieces of bacon
1/2 large red onion, chopped
2 Tablespoons flour
1/4 teaspoon pepper
1/2 cup whipping cream (whole milk will do)
1 1/2 cup chicken broth
2 cups shredded cheddar cheese
1 cup diced turkey
Fry bacon and onions in large, deep frying pan, keeping them mostly separate. When the bacon is crispy, take it out and put it on a paper towel-lined plate. Drain off most of the bacon drippings, leaving about 2 Tbsp. Add the turkey, flour and the pepper to the onions and bacon drippings. Cook, stirring constantly, until bubbly. Then keep stirring occasionally for 2-4 minutes.
Cut bacon in small pieces and reserve, keeping warm.
Stir in broth. Heat to boiling, stirring constantly. Add cheese; when cheese is melted, add cream and bacon. Cook, stirring frequently, until warmed through.
Serve soup warm with crusty bread.
It is pictured above garnished with a little bacon and served with Irish Soda Bread. I don't eat the soup (I'm not a carnivore), but I love the bread! It's good with almost any soup. A missionary friend from Japan gave me the recipe, and here it is:
IRISH SODA BREAD
4 cups unsifted flour [I used 2 cups white and 2 cups whole wheat pastry flour and it turned out great!]
½ cup sugar
¼ tsp baking soda
2 tsp baking powder
½ tsp salt
1 ½ cups buttermilk (or yogurt)
2 eggs
4 oz (1 stick) butter or margarine
½ lb. raisins (optional)
1 tsp caraway seeds (optional) [I never have put in raisins or caraway seeds… ick]
Preheat oven to 350F
Mix dry ingredients in a large bowl. Toss mixture with hands (this gives the bread a light, airy consistency).
Add softened butter to the flour mixture, still using hands, and blend until evenly distributed. [I have found that if you use cold butter, and mix about half of it in evenly and the other half in small clumps, as you would for biscuits, it’s even lighter and better]
Add raisins and caraway seeds. Toss with hands.
Beat eggs in a separate bowl. Add buttermilk and blend well.
Pour egg mixture, a little at a time, into dry mixture. Blend well with a spoon. [I do the biscuit thing again – I make a hole in the center and pour it all in at once. Then I use my hands]
The dough should be heavy but not too wet. If it seems too dry, add a little more buttermilk [Mine is always VERY wet… and it always turns out tasty]
Dust hands with flour and mold dough into a round. Place dough in a greased 9” round pan. Dust top generously with flour. [Again, mine never really molds. It really just plops/spreads. But it’s always good]
Using the wrong end of a fork, cut a deep cross in the dough. This will prevent the bread from cracking, and will give it a traditional look. [Um… again, mine is too wet for this really to work]
Bake at 350F for one hour, or until well browned. Cool on rack.
I’ve started making honey butter to go with this – use equal amounts softened butter and honey, and stir together. Rocket science!
Enjoy! And don't blame me if your arteries clog!
Monday, November 15, 2010
Capitol Hill Cooks by Linda Bauer
Per Alison's request I am posting this review here. It originated on my other blog.
 384 pages
Published August 16, 2010
by Taylor Trade Publishing
Lanham, MD
When I cook I tend to stick to family recipes or those found within the cookbooks I've been given, or even those posted online. It is definitely a rare occurrence for me to buy a cookbook, let alone borrow one from the library and an even more rare occurrence for me to post a review. But when I first learned of Capitol Hill Cooks: Recipes from the White House, Congress, And All of the Past Presidents I was immediately intrigued. A new release I requested a copy from my library and began flipping through. It is indeed an intriguing cookbook and as such I felt it deserved a little attention by way of a review.
At first glance I assumed Capitol Hill Cooks: Recipes from the White House, Congress and All of the Past Presidents to be a collection of recipes by cooks of the White House and Congress, but I was partly wrong. It is a collection of recipes, but they are from actual elected officials -- Senators, Representatives, and the President and his First Lady. In some ways this is even more exciting for those enthralled by American history and the Who's Who of Washington, DC politics both past and present. My only dispute with this title is that it claims to include recipes from "all of the former presidents" and that's not exactly true. I checked and at least one (Millard Filmore) does not have a recipe attributed to him. Still, the majority do and it's truly fascinating to see what were the favorite dishes of nearly all of our Commander in Chiefs.
Capitol Hill Cooks contains over 200 recipes from 49 states and 2 United States territories. The cookbook is divided by courses. First come the appetizers, then salads, next soups and stews, then side dishes, main dishes, meats, poultry and seafood, breads and finally cakes and cookies, pies and desserts and snacks and sauces. Last a special collection of "favorite dishes of the presidents."
As far as cooking goes, the recipes appear to be fairly simple and straight forward and, for the most part, do not require any special ingredients, though there are the few exceptions.
Personally, while I thought Capitol Hill Cooks was a really clever idea, it unfortunately did not contain enough recipes that I would use to justify my owning a copy. However, before the book is due back at the library I do plan to try a few recipes and I might end up changing my mind, we'll see. The top recipes to catch my eye include: Senator Wicker's (MS) Poppy Seed Chicken, Rep. Honda's (CA) Japanese Chicken Salad, Senator Boxer's (CA) Lemon Blueberry Muffins, and President Reagan's The Reagan Family Cranberry Sauce. And if I feel brave enough I might even try my hand at a favorite of President George Washington's -- Nelly Custis' recipe for Hoecakes or Thomas Jefferson's Chicken Fricassee.
Along with the tasty there are one or two recipes that made me grimace. Most notable was Rep. Coble's (NC) entry of Breakfast "Brains and Eggs," which do include the real thing: pork brains in gravy. (Ewww!!!) No thank you.
My only grievance with this cookbook is that it contains no pictures. I personally find myself more likely to try a recipe if I can see how the dish is appears. This cookbook could read more like a work of non-fiction if the reader doesn't mind reading all the measurements. Several of the recipes contain brief notes about the history of the dish or a the reason for its inclusion by the elected official. My favorite little tidbit was that the Eggnog recipe credited to George Washington was recently discovered written in Washington's own hand. How cool is that?
All in all, Capitol Hill Cooks is a fun cookbook for those looking for something historic this holiday season. Even though I don't plan to buy a copy I was glad that my library offers the option to preview this cookbook.
 384 pages
Published August 16, 2010
by Taylor Trade Publishing
Lanham, MD
When I cook I tend to stick to family recipes or those found within the cookbooks I've been given, or even those posted online. It is definitely a rare occurrence for me to buy a cookbook, let alone borrow one from the library and an even more rare occurrence for me to post a review. But when I first learned of Capitol Hill Cooks: Recipes from the White House, Congress, And All of the Past Presidents I was immediately intrigued. A new release I requested a copy from my library and began flipping through. It is indeed an intriguing cookbook and as such I felt it deserved a little attention by way of a review.
At first glance I assumed Capitol Hill Cooks: Recipes from the White House, Congress and All of the Past Presidents to be a collection of recipes by cooks of the White House and Congress, but I was partly wrong. It is a collection of recipes, but they are from actual elected officials -- Senators, Representatives, and the President and his First Lady. In some ways this is even more exciting for those enthralled by American history and the Who's Who of Washington, DC politics both past and present. My only dispute with this title is that it claims to include recipes from "all of the former presidents" and that's not exactly true. I checked and at least one (Millard Filmore) does not have a recipe attributed to him. Still, the majority do and it's truly fascinating to see what were the favorite dishes of nearly all of our Commander in Chiefs.
Capitol Hill Cooks contains over 200 recipes from 49 states and 2 United States territories. The cookbook is divided by courses. First come the appetizers, then salads, next soups and stews, then side dishes, main dishes, meats, poultry and seafood, breads and finally cakes and cookies, pies and desserts and snacks and sauces. Last a special collection of "favorite dishes of the presidents."
As far as cooking goes, the recipes appear to be fairly simple and straight forward and, for the most part, do not require any special ingredients, though there are the few exceptions.
Personally, while I thought Capitol Hill Cooks was a really clever idea, it unfortunately did not contain enough recipes that I would use to justify my owning a copy. However, before the book is due back at the library I do plan to try a few recipes and I might end up changing my mind, we'll see. The top recipes to catch my eye include: Senator Wicker's (MS) Poppy Seed Chicken, Rep. Honda's (CA) Japanese Chicken Salad, Senator Boxer's (CA) Lemon Blueberry Muffins, and President Reagan's The Reagan Family Cranberry Sauce. And if I feel brave enough I might even try my hand at a favorite of President George Washington's -- Nelly Custis' recipe for Hoecakes or Thomas Jefferson's Chicken Fricassee.
Along with the tasty there are one or two recipes that made me grimace. Most notable was Rep. Coble's (NC) entry of Breakfast "Brains and Eggs," which do include the real thing: pork brains in gravy. (Ewww!!!) No thank you.
My only grievance with this cookbook is that it contains no pictures. I personally find myself more likely to try a recipe if I can see how the dish is appears. This cookbook could read more like a work of non-fiction if the reader doesn't mind reading all the measurements. Several of the recipes contain brief notes about the history of the dish or a the reason for its inclusion by the elected official. My favorite little tidbit was that the Eggnog recipe credited to George Washington was recently discovered written in Washington's own hand. How cool is that?
All in all, Capitol Hill Cooks is a fun cookbook for those looking for something historic this holiday season. Even though I don't plan to buy a copy I was glad that my library offers the option to preview this cookbook.
Thursday, November 11, 2010
Taco Pasta
I my quest for recipes that use tomato paste, I came across this meal on the $5 Dinner Mom blog. I changed several things based on what I had in my pantry and my personal tastes. If you'd like to see the original recipe, go here. It got rave reviews from the men in our house, which means it's a keeper. :-)
TACO PASTA
Ingredients
1 lb. ground beef (I used precooked hamburger from my freezer)
1- 6 oz. can tomato paste
15 oz. can pinto beans (original recipe calls for kidney beans, I think pinto beans are more "mexican" and it's what I had on hand)
1 pgk. taco seasoning (orginal recipe uses various spices, this was easier for me)
2 cups uncooked rotini pasta (I used whole grain pasta)
1 c. frozen corn (I used the last of a bag of corn I had on hand. You could substitute 1 can of corn)
1-2 cups shredded cheese (optional, I skipped this)
Directions
1. In large skillet, brown ground beef. Drain and return to skillet. Skip this step if you are using pre-cooked hamburger.
2. Add tomato paste plus 2 cans worth of water to the ground beef. Stir until paste becomes tomato-y sauce. Add drained and rinsed beans. Add corn. Add taco seasoning. Stir through and let simmer for 4-5 minutes until hot.
3. Add 2 cups uncooked pasta with 2 cups of water to the meat mixture. Cover and cook over medium high heat for 10-12 minutes, or until pasta has cooked through. Stir a few times while pasta is cooking.
4. Top with cheese if desired.
TACO PASTA
Ingredients
1 lb. ground beef (I used precooked hamburger from my freezer)
1- 6 oz. can tomato paste
15 oz. can pinto beans (original recipe calls for kidney beans, I think pinto beans are more "mexican" and it's what I had on hand)
1 pgk. taco seasoning (orginal recipe uses various spices, this was easier for me)
2 cups uncooked rotini pasta (I used whole grain pasta)
1 c. frozen corn (I used the last of a bag of corn I had on hand. You could substitute 1 can of corn)
1-2 cups shredded cheese (optional, I skipped this)
Directions
1. In large skillet, brown ground beef. Drain and return to skillet. Skip this step if you are using pre-cooked hamburger.
2. Add tomato paste plus 2 cans worth of water to the ground beef. Stir until paste becomes tomato-y sauce. Add drained and rinsed beans. Add corn. Add taco seasoning. Stir through and let simmer for 4-5 minutes until hot.
3. Add 2 cups uncooked pasta with 2 cups of water to the meat mixture. Cover and cook over medium high heat for 10-12 minutes, or until pasta has cooked through. Stir a few times while pasta is cooking.
4. Top with cheese if desired.
Tuesday, November 09, 2010
Orange Chicken
I came up with this recipe and was told it was a Top Ten by my husband.

Heat a large skillet over medium-high heat. Add oil to pan and swirl to coat. Add chicken and cook 5 minutes on each side or until cooked thoroughly. Remove from pan. Add jam, wine, and garlic to pan; bring to a boil. Cook sauce 2 minutes, stirring occasionally. Turn off heat and return chicken to pan, long enough to coat with sauce. Serve with rice. (I use brown basmati) Serves 4.

- 1 T olive oil
- 1 lb skinless, boneless chicken thighs or breasts, cut into small pieces
- 1/2 C Blood Orange Jam (available at World Market)*
- 2 T white wine (I use Charles Shaw chardonnay available at Trader Joes for 2.49)
- 2 garlic cloves, minced
Heat a large skillet over medium-high heat. Add oil to pan and swirl to coat. Add chicken and cook 5 minutes on each side or until cooked thoroughly. Remove from pan. Add jam, wine, and garlic to pan; bring to a boil. Cook sauce 2 minutes, stirring occasionally. Turn off heat and return chicken to pan, long enough to coat with sauce. Serve with rice. (I use brown basmati) Serves 4.
Friday, November 05, 2010
Making Ahead...Eating Healthier...Spending Less
I've really started getting into shopping sales and using coupons. Because I'm busy with working, babysitting and being a mom and wife, I limit myself to 2 stores within a few blocks of my house and one store by my work. I've also started to do small amounts of making things ahead. Here are some tips and ideas that have worked for me. (Now you know why I have lots of tomato paste! lol)
BEANS: I'm making more bean meals because they are cheap and a great source of protien instead of meat. Canned beans are cheap, but cooking up a pot of beans and freezing them in can size or 1 cup portions is even cheaper. (Canned beans run $0.50-$0.90/each, a bag of dried beans is usually around $1 and cooks up to 6-8 cans worth.) Just put a bag or two of beans in a large pot, soak overnight and simmer on low until the beans squish between your fingers when gently squeezed. Very easy to do!
Suggested bean meals: chili, bean soup, vegetarian taco salad, taco pasta, tacos or tostados.
POTATOES: I just bought two bags of potatoes today for $0.99 each. Store potatoes in a cool and dark location for use as is or shred potatoes and freeze to make your own hash browns.
Suggested potato meals: baked potato night, potato soup, breakfast casserole, breakfast skillets, cheesy potato casserole.
HAMBURGER: Whenever I buy hamburger these days, I either wait for a sale or buy a bulk package of it and brown the meat as soon as I get home. Freeze in approx. 1lb. portions.
Suggested hamburger meals: chili, enchiladas, spaghetti, hamburger stew, queso dip, pizza pasta casserole.
CHICKEN: Ditto the hamburger. I use my Walmart brand "George Foreman" grill took cook up the chicken. Dice and freeze in 1lb. portions. I want to try roasting the chicken in my stove, but have yet to do it.
Suggested chicken meals: enchilada soup, quesadillas, chicken tetrazzini, chicken noodle soup, white chili, colorful chicken casserole.
Please share your ideas, tips and recipes. I'm curious if anyone has tried cooking and freezing rice.
BEANS: I'm making more bean meals because they are cheap and a great source of protien instead of meat. Canned beans are cheap, but cooking up a pot of beans and freezing them in can size or 1 cup portions is even cheaper. (Canned beans run $0.50-$0.90/each, a bag of dried beans is usually around $1 and cooks up to 6-8 cans worth.) Just put a bag or two of beans in a large pot, soak overnight and simmer on low until the beans squish between your fingers when gently squeezed. Very easy to do!
Suggested bean meals: chili, bean soup, vegetarian taco salad, taco pasta, tacos or tostados.
POTATOES: I just bought two bags of potatoes today for $0.99 each. Store potatoes in a cool and dark location for use as is or shred potatoes and freeze to make your own hash browns.
Suggested potato meals: baked potato night, potato soup, breakfast casserole, breakfast skillets, cheesy potato casserole.
HAMBURGER: Whenever I buy hamburger these days, I either wait for a sale or buy a bulk package of it and brown the meat as soon as I get home. Freeze in approx. 1lb. portions.
Suggested hamburger meals: chili, enchiladas, spaghetti, hamburger stew, queso dip, pizza pasta casserole.
CHICKEN: Ditto the hamburger. I use my Walmart brand "George Foreman" grill took cook up the chicken. Dice and freeze in 1lb. portions. I want to try roasting the chicken in my stove, but have yet to do it.
Suggested chicken meals: enchilada soup, quesadillas, chicken tetrazzini, chicken noodle soup, white chili, colorful chicken casserole.
Please share your ideas, tips and recipes. I'm curious if anyone has tried cooking and freezing rice.
Monday, November 01, 2010
Ideas? Tomato Paste
Wow! I've been bad about posting here. Life has been busy and I've been distracted with spoiling my new niece. While my sister in law is on maternity leave, my schedule is different and I'm working at the office more. After Christmas, things will return to "normal". (Ha! If there is such a thing.)
While you are waiting on more recipes, does any one have ideas for using up tomato paste?
While you are waiting on more recipes, does any one have ideas for using up tomato paste?
Monday, October 25, 2010
Curry Pumpkin Soup
I'm always on the lookout for some new recipe to try. You just never know where you're going to find the next family favorite. I especially love soup and stew recipes when the weather turns cold. This is the perfect recipe for a chilly autumn evening.
I found this Curry Pumpkin Soup recipe while flipping through the October 2008 issue of Better Homes And Gardens Magazine at a friend's house. Luckily BH&G keeps a catalog of their recipes online so it was each to track it down. To print your own copy click on the picture below and follow the link to the BH&G website.
 Overall I was pleased with how simple a recipe and how tasty the soup was. My three year-old wasn't a fan, but my husband and I really enjoyed it.
 With the exception of orange zest and onions (which we never have in our house, my husband hates them) we had all the ingredients in stock. Right there that is a plus for this recipe. I hate it when you have to go hunting for rare ingredients. The recipe was easy to follow and made enough leftovers we easily got two meals from one batch. Of course if I had doubled we could have had leftovers to freeze, but I'm short on freezer space and with such a fast and simple recipe it won't be a big deal to make it again anytime we are looking for something like this.
I should note that I don't have a food processor, so I used my blender and that worked just fine.
Another great thing about this recipe is that it can be done as time allows. It's a quick recipe, but I started it earlier in the day as that is what my schedule allowed. I completed all of step 2 and left the soup to cool. Later I came back and finished step 3 and just before step 4 I completed the Orange-Cranberry Topper (Step 1). This worked well and dinner was ready when my husband walked in the door.
One other slight change, I only had 1 can of chicken broth, so I substituted 1 can of vegetable broth for the missing can. Which got me thinking.... taking out the other can this could easily become a vegetarian soup. If you substituted the butter and milk with something else it could even be vegan. Pretty versatile if you ask me!
Definitely a great dish, would make again. Great if served with fresh bread or rolls or cranberry orange muffins.
I found this Curry Pumpkin Soup recipe while flipping through the October 2008 issue of Better Homes And Gardens Magazine at a friend's house. Luckily BH&G keeps a catalog of their recipes online so it was each to track it down. To print your own copy click on the picture below and follow the link to the BH&G website.
 Overall I was pleased with how simple a recipe and how tasty the soup was. My three year-old wasn't a fan, but my husband and I really enjoyed it.
 With the exception of orange zest and onions (which we never have in our house, my husband hates them) we had all the ingredients in stock. Right there that is a plus for this recipe. I hate it when you have to go hunting for rare ingredients. The recipe was easy to follow and made enough leftovers we easily got two meals from one batch. Of course if I had doubled we could have had leftovers to freeze, but I'm short on freezer space and with such a fast and simple recipe it won't be a big deal to make it again anytime we are looking for something like this.
I should note that I don't have a food processor, so I used my blender and that worked just fine.
Another great thing about this recipe is that it can be done as time allows. It's a quick recipe, but I started it earlier in the day as that is what my schedule allowed. I completed all of step 2 and left the soup to cool. Later I came back and finished step 3 and just before step 4 I completed the Orange-Cranberry Topper (Step 1). This worked well and dinner was ready when my husband walked in the door.
One other slight change, I only had 1 can of chicken broth, so I substituted 1 can of vegetable broth for the missing can. Which got me thinking.... taking out the other can this could easily become a vegetarian soup. If you substituted the butter and milk with something else it could even be vegan. Pretty versatile if you ask me!
Definitely a great dish, would make again. Great if served with fresh bread or rolls or cranberry orange muffins.
Saturday, October 02, 2010
Shoo-Fly Pie
Recently I made a Shoo-Fly Pie to bring with me to the September meeting of my book club. I wanted something that reminded me of early fall and this molasses dessert seemed perfect.
I remember my mother serving this pie once or twice when I was a child. I don't remember where I picked up this particular recipe. The copy I have is typed on a typewriter and has no name. I've had it for years.

(One 9" pie)
This pie has a "damp zone" next to the crust. It is sometimes referred to as the "wet-bottom shoo-fly." Most people prefer this one above the others.
Ingredients:
1 Pastry shell, unbaked
1 egg yolk
1/2 cup molasses
3/4 cup boiling water
1 tsp. baking soda
1 cup flour
1/2 tsp cinnamon
1/8 tsp nutmeg
1/8 tsp ginger
1/8 tsp cloves
1/2 cup brown sugar
1/2 tsp salt
2 TBS shortening (butter or margarine)
Directions:
1. Preheat oven to 400°F.
2. Beat the egg yolk in a small bowl.
3. Blend in the molasses.
4. Add baking soda to boiling water and let it dissolve.
5. Add water/baking soda mix to molasses mixture. Set aside.

6. Combine dry ingredients with shortening and work into crumbs with fingers.

7. Pour liquid into pastry shell.
8. Top with crumbs.

9. Bake in 400°F oven for 10 minutes. Then reduce heat to 325°F and bake 35 minutes longer.

Serve warm or cooled.
*** GLUTEN-FREE***
When I've made this pie in the past I've used normal wheat flour, but since several of the ladies in my club have gluten allergies I obtained some gluten-free pie crust mix and proceeded to make the pie gluten free. If you would like to try and make this recipe gluten-free I should point out that the topping ALSO includes flour (just a cup), so it's important to obtain some gluten-free flour in addition to the flour used in the pie crust (or the pie crust mix). Having tried this pie both with and without gluten flour I declare it delicious!
Here are some tips should you decide to try this pie gluten-free.
 Tip 1. If you've never made a gluten-free pie before (or are a novice when it comes to pie crusts) I highly encourage you to try a box mix. I found a mix at a local health food store, but more and more general and specialized grocery stores are starting to carry gluten-free mixes and flour. I chose a mix because I'd never made a gluten-free pie before and had no time to experiment.
Tip 2. Although they don't taste much different than regular wheat flour crusts, gluten-free pie crusts are not the same consistency. They are STICKY! It's best to use plastic wrap on the bottom and top of the cr ust when you roll it out. This will also make transferring it to the pie pan much easier and will help prevent breakage and crumbling.


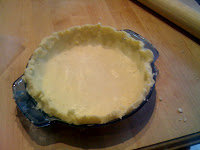
For more information about the history of Shoo-Fly Pie check out the article on Wikipedia or What's Cooking America
Other versions of Shoo-Fly Pie.
I remember my mother serving this pie once or twice when I was a child. I don't remember where I picked up this particular recipe. The copy I have is typed on a typewriter and has no name. I've had it for years.

Shoo-Fly Pie
This pie has a "damp zone" next to the crust. It is sometimes referred to as the "wet-bottom shoo-fly." Most people prefer this one above the others.
Ingredients:
1 Pastry shell, unbaked
1 egg yolk
1/2 cup molasses
3/4 cup boiling water
1 tsp. baking soda
1 cup flour
1/2 tsp cinnamon
1/8 tsp nutmeg
1/8 tsp ginger
1/8 tsp cloves
1/2 cup brown sugar
1/2 tsp salt
2 TBS shortening (butter or margarine)
Directions:
1. Preheat oven to 400°F.
2. Beat the egg yolk in a small bowl.
3. Blend in the molasses.
4. Add baking soda to boiling water and let it dissolve.
5. Add water/baking soda mix to molasses mixture. Set aside.

6. Combine dry ingredients with shortening and work into crumbs with fingers.

7. Pour liquid into pastry shell.

8. Top with crumbs.

9. Bake in 400°F oven for 10 minutes. Then reduce heat to 325°F and bake 35 minutes longer.

Serve warm or cooled.
*** GLUTEN-FREE***
When I've made this pie in the past I've used normal wheat flour, but since several of the ladies in my club have gluten allergies I obtained some gluten-free pie crust mix and proceeded to make the pie gluten free. If you would like to try and make this recipe gluten-free I should point out that the topping ALSO includes flour (just a cup), so it's important to obtain some gluten-free flour in addition to the flour used in the pie crust (or the pie crust mix). Having tried this pie both with and without gluten flour I declare it delicious!
Here are some tips should you decide to try this pie gluten-free.
 Tip 1. If you've never made a gluten-free pie before (or are a novice when it comes to pie crusts) I highly encourage you to try a box mix. I found a mix at a local health food store, but more and more general and specialized grocery stores are starting to carry gluten-free mixes and flour. I chose a mix because I'd never made a gluten-free pie before and had no time to experiment.
Tip 2. Although they don't taste much different than regular wheat flour crusts, gluten-free pie crusts are not the same consistency. They are STICKY! It's best to use plastic wrap on the bottom and top of the cr ust when you roll it out. This will also make transferring it to the pie pan much easier and will help prevent breakage and crumbling.


For more information about the history of Shoo-Fly Pie check out the article on Wikipedia or What's Cooking America
Other versions of Shoo-Fly Pie.
Friday, October 01, 2010
Homemade Macaroni & Cheese
This is another family recipe. I'm sure it originated with an actual recipe from a book, but I believe it's gone through enough adaptions I can call it a family recipe. Growing up my mother refused to purchase and make the box macaroni and cheese. It wasn't until I was a teen and babysitting that I ever tried the "instant" mac. As an adult I've discovered a renewed interest in my mother's recipe and have adapted it a little to suit my family's tastes.

Homemade Macaroni & Cheese
Ingredients:
3 cups of pasta*
2 cups milk
1/4 cup flour (not whole wheat)
1 tsp. mustard
1 tsp. Worcestershire sauce
1/2 tsp. salt
3/4 lb cheese (shredded)**
1 cup sour cream (use light sour cream for less fat)
bread crumbs (optional)***
* My mother always used whole wheat elbow macaroni. I've expanded to try other cuts of pasta including spiral, small shell and as pictured here gemelli.
** My mother always used sharp cheddar cheese. I've expanded to use 1/2lb cheddar and 1/4lb Gouda. The Gouda cheese adds some color and makes the dish a little cheesier/gooier. I love it. Like the pasta in this dish the types of cheese you use can change around the taste and make it seem different each time you serve.
*** My mother always made her own breadcrumbs. I often take the easy way out and use store bought crumbs. Plain is preferred over the Italian.
Directions:
1. Cook pasta.
2. Meanwhile mix together ingredients 2-6 (milk, flour, mustard, Worcestershire sauce, salt) in a microwavable bowl or measuring cup, leave room for liquid to expand.
3. Microwave/cook until thickened. (!!) Warning: Keep an eye on this container while it cooks. It tends to thicken suddenly and boil over if not stopped in time. (!!)
4. Add shredded cheese to sauce and mix until cheese melts.
5. Stir in sour cream.
6. Stir in pasta.
7. Pour into a microwavable/oven safe container.
7. Cover and microwave on HIGH for 10 minutes to heat thoroughly.
8. (Optional) Top with bread crumbs.
9. Put under oven broiler for a couple minutes until bread crumbs or top is lightly browned.
Great served with a garden salad as a side.


Homemade Macaroni & Cheese
Ingredients:
3 cups of pasta*
2 cups milk
1/4 cup flour (not whole wheat)
1 tsp. mustard
1 tsp. Worcestershire sauce
1/2 tsp. salt
3/4 lb cheese (shredded)**
1 cup sour cream (use light sour cream for less fat)
bread crumbs (optional)***
* My mother always used whole wheat elbow macaroni. I've expanded to try other cuts of pasta including spiral, small shell and as pictured here gemelli.
** My mother always used sharp cheddar cheese. I've expanded to use 1/2lb cheddar and 1/4lb Gouda. The Gouda cheese adds some color and makes the dish a little cheesier/gooier. I love it. Like the pasta in this dish the types of cheese you use can change around the taste and make it seem different each time you serve.
*** My mother always made her own breadcrumbs. I often take the easy way out and use store bought crumbs. Plain is preferred over the Italian.
Directions:
1. Cook pasta.
2. Meanwhile mix together ingredients 2-6 (milk, flour, mustard, Worcestershire sauce, salt) in a microwavable bowl or measuring cup, leave room for liquid to expand.
3. Microwave/cook until thickened. (!!) Warning: Keep an eye on this container while it cooks. It tends to thicken suddenly and boil over if not stopped in time. (!!)
4. Add shredded cheese to sauce and mix until cheese melts.
5. Stir in sour cream.
6. Stir in pasta.
7. Pour into a microwavable/oven safe container.
7. Cover and microwave on HIGH for 10 minutes to heat thoroughly.
8. (Optional) Top with bread crumbs.
9. Put under oven broiler for a couple minutes until bread crumbs or top is lightly browned.
Great served with a garden salad as a side.

Wednesday, September 29, 2010
Pasta Fresca
Nathan and I love eating at Noodles & Co. Our favorite dish is the Pasta Fresca. We figured we could easily make this dish at home so Nathan found a recipe. We've further refined it to match the dish at Noodles. This can be a vegetarian or add meat.
PASTA FRESCA
Serves 2
Sauté Instructions: In a very hot sauté pan, add:2 tsp. extra virgin olive oil 2 1/2 cups pre-cooked penne pasta, 1/4 c. (I just throw in however much looks good) thin wedges red onions, 2 shakes of kosher salt & cracked pepper. Sear noodles, stirring occasionally until steaming hot.
Add: 1-2 roma tomatoes cut into wedges, 1 oz. baby fresh spinach, 1 oz. fresca sauce (recipe below). Again, I just add tomato and spinach until it looks right. NOTE: add tomato near the very end or your tomato will end up pretty mashed up. Toss to combine.
Serve with freshly shaved parmesan cheese or feta cheese. Top with grilled or breaded chicken, beef or shrimp. Nathan likes parmesan breaded chicken and feta cheese on his. I like grilled chicken and fresh parmesan on mine. Personalize to your tastes. Enjoy!
FRESCA SAUCE:(for 2-3 batches depending on how much you use)
NOTES: I minced my own fresh garlic and found that I could use WAY less than called for. Keep extra sauce in a jar in your fridge for next time or make less sauce.
1/4 cup fresh garlic
2 tsp. kosher salt
1/4 cup balsamic vinegar
1/4 cup sweet white wine
1 cup extra virgin olive oil
Mix well.
PASTA FRESCA
Serves 2
Sauté Instructions: In a very hot sauté pan, add:2 tsp. extra virgin olive oil 2 1/2 cups pre-cooked penne pasta, 1/4 c. (I just throw in however much looks good) thin wedges red onions, 2 shakes of kosher salt & cracked pepper. Sear noodles, stirring occasionally until steaming hot.
Add: 1-2 roma tomatoes cut into wedges, 1 oz. baby fresh spinach, 1 oz. fresca sauce (recipe below). Again, I just add tomato and spinach until it looks right. NOTE: add tomato near the very end or your tomato will end up pretty mashed up. Toss to combine.
Serve with freshly shaved parmesan cheese or feta cheese. Top with grilled or breaded chicken, beef or shrimp. Nathan likes parmesan breaded chicken and feta cheese on his. I like grilled chicken and fresh parmesan on mine. Personalize to your tastes. Enjoy!
FRESCA SAUCE:(for 2-3 batches depending on how much you use)
NOTES: I minced my own fresh garlic and found that I could use WAY less than called for. Keep extra sauce in a jar in your fridge for next time or make less sauce.
1/4 cup fresh garlic
2 tsp. kosher salt
1/4 cup balsamic vinegar
1/4 cup sweet white wine
1 cup extra virgin olive oil
Mix well.
Monday, September 27, 2010
Cheesy Stuffed Shells
 I used to get Kraft Kitchens magazine when it was free. It was full of quick and simple recipes that used an awful lot of Kraft products, but many were easily modified to make great dinners and desserts. And of course, I didn't always use Kraft products!
This recipe is probably our favorite from the magazine. My carnivorous husband loves it, and I think you could add either some cooked Italian sausage to the cheese mix, tuck a meatball in each shell, or just serve it as a side with a grilled steak or chicken. But it is also great on its own!
Easy Cheesy Stuffed Shells
Prep time - 30 min - Total time - 60 min
Makes 5 servings
Ingredients:
1 container (16 oz.) 2% Milkfat Low Fat Cottage Cheese
1 pkg. (10 oz.) frozen chopped spinach, thawed, well drained (I use a bag of fresh spinach)
2 cups Shredded Mozzarella Cheese, divided
1/4 cup Grated Parmesan Cheese
1 tsp. Italian seasoning
20 jumbo pasta shells, cooked, drained
1 jar (26 oz.) spaghetti sauce
DIRECTIONS
HEAT oven to 400°F. Mix cottage cheese, spinach, 1/2 cup mozzarella, Parmesan and seasoning; spoon into shells.
SPOON half the sauce into 13x9-inch baking dish. Add filled shells; top with remaining sauce and remaining mozzarella (and more Parmesan, if desired - I like it cheesy!).
BAKE uncovered 25 min. or until heated through.
Make Ahead
Assemble recipe as directed. Refrigerate up to 24 hours. When ready to serve, bake, covered, at 400°F for 35 min. or until heated through.
Freeze Ahead
Reserve 1 and 1/2 cup of the mozzarella. Assemble recipe as directed, but do not top with the reserved mozzarella. Wrap casserole in foil; freeze. When ready to serve, heat oven to 400°F. Unwrap casserole; cover with foil. Bake 55 min. or until heated through, removing foil after 30 min. Top with reserved mozzarella; bake 10 min. or until melted.
Tuesday, September 21, 2010
Heirloom Food
 My grandpa's funeral is this week. He lived 93 full and interesting years and it was his time to pass. However, I feel like I've lost a valuable link to history - he was born during World War I, grew up during the depression, joined the Navy during WWII... it is astonishing to consider the events and eras he lived though.
I can't experience life the way my grandparents lived when they were my age, so I really enjoy making recipes that they ate, enabling me to both smell and taste some history. This is a recipe my grandma made, and everyone who tries it loves it. So put on your fabulous 50's dress, pearls, and heels and whip some up for yourself!
OATMEAL CARMELLETES
Caramel Filling
32 caramels
5 Tablespoons light cream or evaporated milk (or regular milk, or heavy cream)
Melt the caramels and milk together. If you use a pan on the stove, stir constantly. If you use a microwave, stir every two minutes at first, and then every minute until caramels are melted.
Bars
1 cup flour
1 cup oatmeal
¾ cup brown sugar
¾ cup melted butter
½ tsp. baking soda
¼ tsp. salt
1 cup chocolate chips
Mix together flour, oatmeal, brown sugar, butter, soda and salt and divide in half. Press half into bottom of 9x9 pan. Bake 10 minutes at 350F. Remove from oven; immediately sprinkle 1 cup chocolate chips on hot crust. Drizzle caramel filling over chips; cover with remaining oatmeal mixture. Bake 15-20 minutes at 325F. Allow to cool before cutting.
BONUS: for a quick and tasty dessert, you can pour a can of cherry, blueberry OR apple pie filling OR put fresh apples, peeled, cored, sliced, and shaken with 1/4 cup flour in a 9x9 pan. Shake some cinnamon sugar over the fruit and top with the bar mixture. Bake at 350F for about 25-30 minutes and voila – apple/cherry/blueberry crisp! I serve it hot with ice cream. (Obviously, you leave out the chocolate and caramels)
P.S. - S. Mehrens - I promise I prepared for this post before I saw your post! I guess it is Grandparents Week here at Cooking! Everyone else, did you have a favorite recipe from a grandparent?
Grandma's Goulash
This is one of my favorite meals from my childhood. Although my paternal grandmother passed away when I was 14 I still have many memories of time we spent together. As far as meals together I have a few scattered memories, but only remember one or two foods she served. My favorite was one I christened: "Grandma's Goulash". It is a very simple recipe and also very delicious.
Grandma's Goulash
 Ingredients:
1 lb ground beef (ground turkey or chicken could be substituted, though I've never tried it)
2 (10oz) cans of condensed tomato soup
1 bag of mixed frozen vegetables (fresh work too, but take longer to cook)
5 or 6 potatoes the size of your palm
Milk
Butter
Salt & Pepper
Directions:
1. Peal and cut up potatoes. Put in boiling water to cook.*
2. Meanwhile cook ground meat in frying pan. When cooked drain fat and set aside to cool slightly.
2. Pour soup and frozen vegetables in bowl and mix together.
3. Add meat, stir.
4. Cover and microwave for 5 minutes. Stir and Heat for another 5 minutes.
5. Drain potatoes and mash adding salt and pepper and milk.
6. Move vegetable/soup/meat mixture to an oven safe container and top with mashed potatoes.
7. Add a dollop of butter and put under oven broiler for 2-5 minutes or until the top of the potatoes just begins to brown.
Great if served with fresh rolls, a garden salad or apple sauce as a side.
 *Optional Substitute: Noodles can be substituted for the mashed potatoes. Instead of topping with potatoes cook noodles and mix with the vegetable/soup/meat mixture.
Grandma's Goulash
 Ingredients:
1 lb ground beef (ground turkey or chicken could be substituted, though I've never tried it)
2 (10oz) cans of condensed tomato soup
1 bag of mixed frozen vegetables (fresh work too, but take longer to cook)
5 or 6 potatoes the size of your palm
Milk
Butter
Salt & Pepper
Directions:
1. Peal and cut up potatoes. Put in boiling water to cook.*
2. Meanwhile cook ground meat in frying pan. When cooked drain fat and set aside to cool slightly.
2. Pour soup and frozen vegetables in bowl and mix together.
3. Add meat, stir.
4. Cover and microwave for 5 minutes. Stir and Heat for another 5 minutes.
5. Drain potatoes and mash adding salt and pepper and milk.
6. Move vegetable/soup/meat mixture to an oven safe container and top with mashed potatoes.
7. Add a dollop of butter and put under oven broiler for 2-5 minutes or until the top of the potatoes just begins to brown.
Great if served with fresh rolls, a garden salad or apple sauce as a side.
 *Optional Substitute: Noodles can be substituted for the mashed potatoes. Instead of topping with potatoes cook noodles and mix with the vegetable/soup/meat mixture.
Wednesday, September 15, 2010
Victory Garden Casserole
One of my mom's good friends is an excellent cook and has shared multiple recipes with me. This is one of them. I'm not sure if she created it herself (she often does this) or if she found it elsewhere. If you are looking for a vegetarian meal with lots of veggies, this is for you.
Victory Garden Casserole
1lb. potatoes, sliced
1- 10oz. pkg. corn
1/2 t. salt
1/2 t. black pepper
1/2 t. dried thyme leaves
3-4 c. shredded cheddar cheese
1/2 lb. carrots, peeled and sliced
1- 10oz. pkg. green beans
1/2 lb. yellow or zucchini squash (can substitute lima beans)
1- 10oz. pkg. green peas
2 c. milk
1/4 c. all purpose flour
1/2-3/4 c. unseasoned fine bread crumbs
2 T. butter, melted
Lightly grease a 3qt. glass casserole dish. In vegetable steamer or double boiler, steam potatoes until tender, about 10 min. Steam corn till hot, 3-5 min. Turn into casserold over potatoes. In cup mix salt, pepper, thyme. Sprinkle 1/3 of salt mixture and 1 c. cheese over corn. Steam carrots until tender, then green beans. Turn into casserold. Sprinkle with 1/2 of remaining salt mixture and 1 c. cheese. Heat oven to 350. Steam squash 3 min. Turn into casserole. Steam peas until hot. Turn into casserole. Meanwhile, in 1 qt. saucepan, with wire qhisk, beat together milk and flour until smooth; heat to boiling and cook, stirring, until sauce is thickened. Stir in remaining salt mixture. With a knife, make a well in the center of the casserole. Pour sauce into well and over top of vegetables. In small bowl combine crumbs and butter; sprinkle evenly over top of casserole. Top with remaining cheese. Bake 30 min at 350 or until golden brown and bubbly.
Victory Garden Casserole
1lb. potatoes, sliced
1- 10oz. pkg. corn
1/2 t. salt
1/2 t. black pepper
1/2 t. dried thyme leaves
3-4 c. shredded cheddar cheese
1/2 lb. carrots, peeled and sliced
1- 10oz. pkg. green beans
1/2 lb. yellow or zucchini squash (can substitute lima beans)
1- 10oz. pkg. green peas
2 c. milk
1/4 c. all purpose flour
1/2-3/4 c. unseasoned fine bread crumbs
2 T. butter, melted
Lightly grease a 3qt. glass casserole dish. In vegetable steamer or double boiler, steam potatoes until tender, about 10 min. Steam corn till hot, 3-5 min. Turn into casserold over potatoes. In cup mix salt, pepper, thyme. Sprinkle 1/3 of salt mixture and 1 c. cheese over corn. Steam carrots until tender, then green beans. Turn into casserold. Sprinkle with 1/2 of remaining salt mixture and 1 c. cheese. Heat oven to 350. Steam squash 3 min. Turn into casserole. Steam peas until hot. Turn into casserole. Meanwhile, in 1 qt. saucepan, with wire qhisk, beat together milk and flour until smooth; heat to boiling and cook, stirring, until sauce is thickened. Stir in remaining salt mixture. With a knife, make a well in the center of the casserole. Pour sauce into well and over top of vegetables. In small bowl combine crumbs and butter; sprinkle evenly over top of casserole. Top with remaining cheese. Bake 30 min at 350 or until golden brown and bubbly.
Tuesday, September 14, 2010
Peach Quesadillas
I forgot the photo and this was supposed to be posted mid-summer when peaches were in season.
8 tortillas
2 large peaches, peeled and thinly sliced
2 sweet onions
2 cups shredded gouda cheese (though I intend to try other cheeses)
Tablespoon olive oil
Olive oil cooking spray
Thinly slice onions. Heat olive oil over medium heat. Saute onions.
Divide onions, peaches, and cheese evenly between tortillas; put on one side.
Cook quesadillas in a skillet coated with cooking spray. Fold in half after 1-2 minutes and then flip. Sides should be golden brown. Cut into several sections.
8 tortillas
2 large peaches, peeled and thinly sliced
2 sweet onions
2 cups shredded gouda cheese (though I intend to try other cheeses)
Tablespoon olive oil
Olive oil cooking spray
Thinly slice onions. Heat olive oil over medium heat. Saute onions.
Divide onions, peaches, and cheese evenly between tortillas; put on one side.
Cook quesadillas in a skillet coated with cooking spray. Fold in half after 1-2 minutes and then flip. Sides should be golden brown. Cut into several sections.
Strawberry Shortcake: Hot Milk Cake
 This past weekend my family and I were heading to some friends for dinner. I needed to pull together a quick dessert and I wanted to keep it light and yet sweet. In the end a sale on strawberries at my local grocery store (I know out of season, but BOGOF can't be beat) helped me to decide. I made strawberry shortcake -- a hot milk cake with fresh strawberries and whipped cream. The dessert was everything I hoped - light, fluffy, sweet, and fruity.
Here's the recipe I used. It's not original I copied it years ago from something my mother had -- I think a cookbook, but I don't remember now. My apologies to the original author, I'd give credit if I knew where to give it.
Hot Milk Cake (a.k.a Hot Milk Sponge Cake)
Ingredients:
2 eggs
1 cup sugar
1 cup flour (Whole Wheat flour tends to weigh cake down, if used proportion to 1/3 cup WW to 2/3 All-Purpose)
1 tsp baking powder
1 TBS butter
1/2 cup of hot milk
Directions:
1. Beat eggs until light and thick
2. Add sugar
3. Heat milk and add butter to milk, set aside
4. Gently fold dry ingredients into wet
5. Add milk (buttered fully melted), fold into batter
6. Pour into lightly greased cake pan (9x9)
7. Bake at 350 for 30 minutes.
Serve with fresh strawberries and whipped cream or chopped peaches.
Monday, September 13, 2010
Sarah's Menu Plan Monday
 I have been working to plan out menus for the month using mostly the food items I have in my fridge, freezer and pantry, but it's sometimes difficult. In the end I usually stick to planning out the coming week and throw in a selection here or there later in the month depending on schedule and availability.
This week I have planned:
Monday: FISH - Parmesan Flounder, Rice, Garden Salad
Tuesday: BEEF - Grandma's Goulash
Wednesday: VEGETARIAN - Homemade Mac & Cheese, Green Beans
Thursday: CHICKEN/CROCKPOT - White Chili with Corn bread
Friday: Leftovers or "Breakfast" food
I have some recipes from the other week as well as this week that I plan to post, so check back if you're interested in a particular recipe (I left my menu as a comment on Alison's Menu Plan Monday - Aug 30). Or leave a comment should you like to see a particular recipe.
Alison's Menu Plan Monday

It's Menu Plan Monday time again! We have drained our fridge of meals and it's time for me to grocery shop again. Check out more menus at Orgjunkie.com.
Menu
Many Bean Soup
Menu
Many Bean Soup
Egg salad sandwiches and fresh veggies
Oriental Beef and Noodles
Hot Dogs
Breakfast Food
Home made pizza
Pasta Fresca
Vegetarian Taco Salads
I also plan on cooking chicken breast and beans for my freezer stash.
Subscribe to:
Posts (Atom)