Showing posts with label Sally. Show all posts

Friday, December 03, 2010

Killer Leftover Turkey Soup

Got leftover turkey? Unclogged arteries? A yearning for tasty-but-bad-for-you soup?

Then try the soup recipe I invented to use up leftover turkey!

TURKEY BACON CHEDDAR SOUP

5-6 pieces of bacon
1/2 large red onion, chopped
2 Tablespoons flour
1/4 teaspoon pepper
1/2 cup whipping cream (whole milk will do)
1 1/2 cup chicken broth
2 cups shredded cheddar cheese
1 cup diced turkey

Fry bacon and onions in large, deep frying pan, keeping them mostly separate. When the bacon is crispy, take it out and put it on a paper towel-lined plate. Drain off most of the bacon drippings, leaving about 2 Tbsp. Add the turkey, flour and the pepper to the onions and bacon drippings. Cook, stirring constantly, until bubbly. Then keep stirring occasionally for 2-4 minutes.

Cut bacon in small pieces and reserve, keeping warm.

Stir in broth. Heat to boiling, stirring constantly. Add cheese; when cheese is melted, add cream and bacon. Cook, stirring frequently, until warmed through.

Serve soup warm with crusty bread.

It is pictured above garnished with a little bacon and served with Irish Soda Bread. I don't eat the soup (I'm not a carnivore), but I love the bread! It's good with almost any soup. A missionary friend from Japan gave me the recipe, and here it is:

IRISH SODA BREAD

4 cups unsifted flour [I used 2 cups white and 2 cups whole wheat pastry flour and it turned out great!]
½ cup sugar
¼ tsp baking soda
2 tsp baking powder
½ tsp salt
1 ½ cups buttermilk (or yogurt)
2 eggs
4 oz (1 stick) butter or margarine
½ lb. raisins (optional)
1 tsp caraway seeds (optional) [I never have put in raisins or caraway seeds… ick]

Preheat oven to 350F

Mix dry ingredients in a large bowl. Toss mixture with hands (this gives the bread a light, airy consistency).

Add softened butter to the flour mixture, still using hands, and blend until evenly distributed. [I have found that if you use cold butter, and mix about half of it in evenly and the other half in small clumps, as you would for biscuits, it’s even lighter and better]

Add raisins and caraway seeds. Toss with hands.

Beat eggs in a separate bowl. Add buttermilk and blend well.

Pour egg mixture, a little at a time, into dry mixture. Blend well with a spoon. [I do the biscuit thing again – I make a hole in the center and pour it all in at once. Then I use my hands]

The dough should be heavy but not too wet. If it seems too dry, add a little more buttermilk [Mine is always VERY wet… and it always turns out tasty]

Dust hands with flour and mold dough into a round. Place dough in a greased 9” round pan. Dust top generously with flour. [Again, mine never really molds. It really just plops/spreads. But it’s always good]

Using the wrong end of a fork, cut a deep cross in the dough. This will prevent the bread from cracking, and will give it a traditional look. [Um… again, mine is too wet for this really to work]

Bake at 350F for one hour, or until well browned. Cool on rack.

I’ve started making honey butter to go with this – use equal amounts softened butter and honey, and stir together. Rocket science!

Enjoy! And don't blame me if your arteries clog!

Monday, September 27, 2010

Cheesy Stuffed Shells

I used to get Kraft Kitchens magazine when it was free. It was full of quick and simple recipes that used an awful lot of Kraft products, but many were easily modified to make great dinners and desserts. And of course, I didn't always use Kraft products!

This recipe is probably our favorite from the magazine. My carnivorous husband loves it, and I think you could add either some cooked Italian sausage to the cheese mix, tuck a meatball in each shell, or just serve it as a side with a grilled steak or chicken. But it is also great on its own!

Easy Cheesy Stuffed Shells


Prep time - 30 min - Total time - 60 min
Makes 5 servings

Ingredients:
1 container (16 oz.) 2% Milkfat Low Fat Cottage Cheese
1 pkg. (10 oz.) frozen chopped spinach, thawed, well drained (I use a bag of fresh spinach)
2 cups Shredded Mozzarella Cheese, divided
1/4 cup Grated Parmesan Cheese
1 tsp. Italian seasoning
20 jumbo pasta shells, cooked, drained
1 jar (26 oz.) spaghetti sauce

DIRECTIONS

HEAT oven to 400°F. Mix cottage cheese, spinach, 1/2 cup mozzarella, Parmesan and seasoning; spoon into shells.

SPOON half the sauce into 13x9-inch baking dish. Add filled shells; top with remaining sauce and remaining mozzarella (and more Parmesan, if desired - I like it cheesy!).

BAKE uncovered 25 min. or until heated through.

Make Ahead
Assemble recipe as directed. Refrigerate up to 24 hours. When ready to serve, bake, covered, at 400°F for 35 min. or until heated through.

Freeze Ahead
Reserve 1 and 1/2 cup of the mozzarella. Assemble recipe as directed, but do not top with the reserved mozzarella. Wrap casserole in foil; freeze. When ready to serve, heat oven to 400°F. Unwrap casserole; cover with foil. Bake 55 min. or until heated through, removing foil after 30 min. Top with reserved mozzarella; bake 10 min. or until melted.

Tuesday, September 21, 2010

Heirloom Food

My grandpa's funeral is this week. He lived 93 full and interesting years and it was his time to pass. However, I feel like I've lost a valuable link to history - he was born during World War I, grew up during the depression, joined the Navy during WWII... it is astonishing to consider the events and eras he lived though.

I can't experience life the way my grandparents lived when they were my age, so I really enjoy making recipes that they ate, enabling me to both smell and taste some history. This is a recipe my grandma made, and everyone who tries it loves it. So put on your fabulous 50's dress, pearls, and heels and whip some up for yourself!

OATMEAL CARMELLETES

Caramel Filling

32 caramels
5 Tablespoons light cream or evaporated milk (or regular milk, or heavy cream)

Melt the caramels and milk together. If you use a pan on the stove, stir constantly. If you use a microwave, stir every two minutes at first, and then every minute until caramels are melted.

Bars

1 cup flour
1 cup oatmeal
¾ cup brown sugar
¾ cup melted butter
½ tsp. baking soda
¼ tsp. salt

1 cup chocolate chips

Mix together flour, oatmeal, brown sugar, butter, soda and salt and divide in half. Press half into bottom of 9x9 pan. Bake 10 minutes at 350F. Remove from oven; immediately sprinkle 1 cup chocolate chips on hot crust. Drizzle caramel filling over chips; cover with remaining oatmeal mixture. Bake 15-20 minutes at 325F. Allow to cool before cutting.

BONUS: for a quick and tasty dessert, you can pour a can of cherry, blueberry OR apple pie filling OR put fresh apples, peeled, cored, sliced, and shaken with 1/4 cup flour in a 9x9 pan. Shake some cinnamon sugar over the fruit and top with the bar mixture. Bake at 350F for about 25-30 minutes and voila – apple/cherry/blueberry crisp! I serve it hot with ice cream. (Obviously, you leave out the chocolate and caramels)

P.S. - S. Mehrens - I promise I prepared for this post before I saw your post! I guess it is Grandparents Week here at Cooking! Everyone else, did you have a favorite recipe from a grandparent?

Monday, September 06, 2010

Teach A Man To Fish...

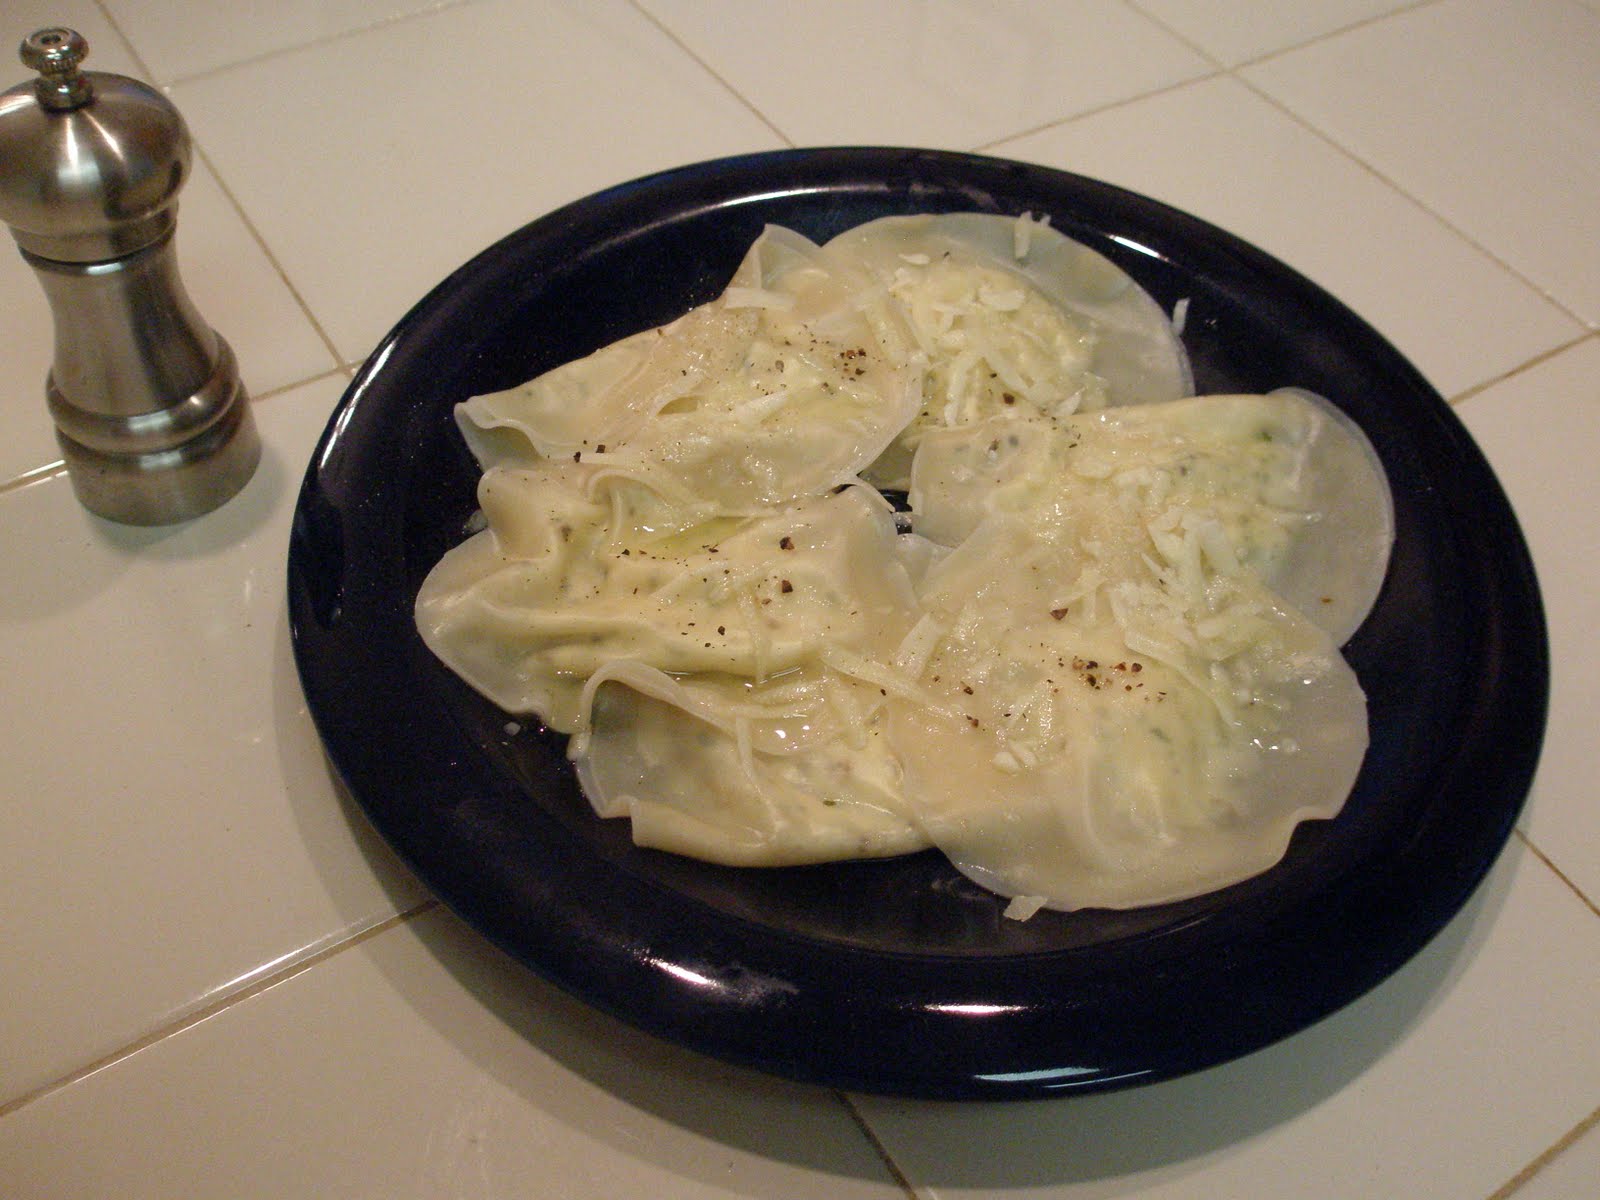
It's still hot here. And this Labor Day, we ran errands and finished off with a trip to the local splash park. So by the time we got home, we were hot and hungry. And I decided to make ravioli.

Crazy, right? Not really. It took about 20 minutes, tops.

I can't publish the recipe here because it's copyrighted and I'm a lawyer so I'm kind of picky about that. Instead, I'll recommend the cookbook, because I use lots of recipes from it anyway.

You know how you can make Mac & Cheese without reading the box? And spaghetti, and a few other things without recipes? Pam (not Pamela) Anderson wants to expand your repertoire with How To Cook Without A Book. She is apparently an incredible cook who would always go out to eat with her family, because cooking was too much work and she didn't want to find and follow a recipe every night. Her mission in publishing this cookbook was to teach some basic cooking rules (i.e. how to sear a meat and make a pan sauce) and then expand on the recipes with different ingredients for different meals. In that way, you learn to make a recipe once or twice with the help of the book, and then can do it from memory.

Let me tell you, I'm reading Ad Hoc At Home by Thomas Keller right now, and that is not his philosophy. But Anderson's recipes really work for those non-special occasion, weeknight dinners. You probably won't need to make an extra trip to the grocery store for exotic ingredients. And her super-easy salad dressings have been a real hit!

How To Cook Without A Book is going on my Christmas list this year (I checked it out from the library), both to give and to get. And I am not a cookbook collector. Do you have it? What do you think of it?

Wednesday, September 01, 2010

Stuffed Pepper Lasagna


I regret to inform all of you that it's still hot here and therefore, still no baking. Here is a quick and easy summer favorite, especially now that peppers are in season! If you need meat, you could probably simmer some sausage or hamburger in a little tomato sauce (so it's flavored and moist but not soupy) for 20 minutes and mix it with the rice.


Stuffed Pepper "Lasagna"
(modified from BHG)

Ingredients

* 4 medium green and/or red sweet peppers - I cut them in to bit-sized pieces

* 1 8.8-oz. pouch cooked Spanish-style rice

* 1 14.5-oz. can stewed tomatoes - I used Muir Glen Fire Roasted Diced Tomatoes for extra spice.

* 4 1-oz. slices Monterey Jack cheese with jalapeño peppers


Directions


1. Quarter peppers; remove stems, seeds, and ribs. Place in 2-quart square microwave-safe baking dish. Add 2 Tbsp. water. Cover with parchment. Microcook on high 4 minutes, until crisp-tender; turn dish once if no turntable. Remove peppers from dish; drain and set aside.


2. Cook rice according to package directions. Drain tomatoes, reserving 2-4 Tbsp. liquid. In baking dish layer half the peppers (cut sides up), the rice, drained tomatoes, Jack cheese, and remaining peppers (cut sides down). Drizzle reserved tomato liquid. Cover with parchment. Microcook on high 5 to 6 minutes, turning once. Let stand 5 minutes. Makes 4 servings.


Enjoy!


Thursday, July 08, 2010

A Sandwich Recipe


I know, I know, I'm kind of ashamed to post a sandwich recipe. Really, if you can't make a sandwich, you're probably not reading cooking blogs. But this is a really good sandwich.

My husband likes egg sandwiches. They consist of a fried egg, mayo, bread and pepper.

He really likes them. That means if he stops home at lunchtime, we have them for lunch.

BORING!

Meet the California Egg Sandwich. An antidote to the plain, dull egg sandwich. And, it's "healthy". Because it has vegetables. And fruit! That's what I tell myself, anyway. It sounds weird, but it's surprisingly good.

Ingredients
Mayonnaise
Ranch dressing
Tomato
1/4 avocado (or more)
Little pat of butter
2 eggs (I use 1 egg, 1 egg white)
2 slices bread

Directions
Spread mayo on one slice of bread and ranch on the other (or mayo and ranch).

Put slices of tomato on one side and avocados on the other.

Fry the eggs in a little butter. I smash the yolks with a fork and lift the edges of the egg as they cook to let the uncooked egg run underneath. That way it cooks very evenly.

Plop the egg on top of the avocados, close the sandwich, and gobble it up!

Wednesday, July 07, 2010

Fajitas! I Just Made Some Easy Fa-jiiiiiiiiiii-tas!


You know you want to belt that out to the tune of "Maria" from West Side Story.

In the summer, I put all my baking recipes away and start using my giant 12" high sides nonstick pan. You can make a lot of things in a pan like this and it's easy to clean up!

Fajitas are great because you can use up veggies that have been hanging around in your fridge, or just buy whatever is on sale. I usually use some combination of onions and bell peppers, and you can also throw in mushrooms, zucchini, summer squash, or whatever other vegetables you need to sneak in and use up. I used up a leftover steak and some purple cabbage with my onions and peppers in the above-pictured meal.

Easy Leftover-User-Upper Fajitas
Serves 4

Ingredients

1 Tablespoon oil
1 onion, chopped in half and then into eighths.
2 bell peppers (of whatever color), again, halved lengthwise and chopped into fat strips.
You can stop there. Or you can add another cup of chopped veggies.

2 pieces of leftover grilled chicken or steak, sliced. Or two steaks or boneless skinless chicken breasts, cut into pieces. Or skip it altogether.

Seasoning:
1 tablespoon chili powder
1 1/2 teaspooons cumin
1 teaspoon black pepper
1 teaspoon salt (I use less)
1/2 teaspoon paprika
1/2 teaspoon dried oregano
1/2 teaspoon garlic powder
1/4 teaspoon onion powder
1/4 teaspoon crushed red pepper flakes (or more...)
If you have cilantro lying around, chopped up (because you're making guacamole or something), you can toss some in as well.

Directions

1. Mix together seasoning ingredients in a small bowl.

2. Heat oil in large pan. Add vegetables and stir fry to nearly desired doneness over medium-high heat.

3. If you're making this meatless or using raw meat, skip this step. If you're using leftover meat, add it to the pan now - you're just warming it up.

4. Sprinkle about 2/3rds of the seasoning over the vegetables (and meat), and add about a 1/4 cup of water. Stir to evenly coat and let the water evaporate. Taste it and see if you want to add more seasoning. If you do, repeat step three with the rest of the seasoning!

5. If you're carnivorous, and using raw meat, take the veggies out of the pan, stir fry the meat, and repeat step three with the remaining 1/3 of seasoning. You can serve the meat separately or combine it with the vegetables.

Serve with shredded cheddar cheese (I know, it technically isn't done - but it's GOOD!), sour cream, and guacamole in burrito shells. And lime slices, if you're fancy!

For Jack (my 18 month old), I skip the burrito shell, cut everything up a little more, mix it together, and feed it to him like a casserole. When my husband saw that, he decided to eat his in a bowl without the shell too. So, gluten free option!

EASY "CHIPOTLE" GUACAMOLE (from the "Chipotle Fan" website)
2 Avocados
1/2 jalapeno pepper, seeded and minced (REALLY minced, if you're not into spicy)
1/4 red onion, minced
2 heaping tablespoons finely chopped cilantro (confession: I just chop it, stems and all, until there are no more leaves. And no one has died or gagged)
1/4 of a lime, juiced
1/2 teaspoon sea salt

Combine all the ingredients in a bowl and mash until smooth. Add additional lime juice or salt to taste.

Disclaimer: I'm originally from Minnesota. And Minnesotans voted Taco Bell their third favorite Mexican restaurant (I can't find the link, but it was in City Pages in 2007 or so). So that may explain some things.

Monday, June 28, 2010

Because I Made It For Lunch...

...and everyone loved it. It's hard to mess this up, and the carnivores in my life think it's super tasty. And I think it's fast and easy!

I give you Pioneer Woman's "Marlboro Man’s SECOND Favorite Sandwich."

It's an early recipe of hers and shockingly contains no butter!

Ingredients

* 4 chicken breasts, pounded to even thickness, 1 per person

* 12 slices bacon, pieces sliced in half, probably 4 slices per person

* 4 rolls or hamburger buns or bread, or none at all

* lemon pepper seasoning – I used Pappy’s.

* sliced cheese – I’ve used Havarti and Colby

Directions

1. Cook cut in half bacon strips as crispy as you like them. Remove bacon and drain on paper towels. Pour off all grease, except for about a tablespoon.

2. Liberally sprinkle both sides of chicken breasts with lemon pepper.

3. Add chicken breasts to pan and cook covered about 4 minutes.

4. Flip chicken and lay desired amount of bacon strips across the breast; add sliced cheese over bacon. Cover pan and allow cheese to melt thoroughly.

5. Serve chicken on roll/bun, whatever bread you want. You can have it plain as an entrée or make it into a sandwich with a little mayonnaise.

Enjoy! I promise I use recipe sources other than The Pioneer Woman and will share them soon!

Friday, June 25, 2010

Chef'N Stem Gem


I will spare you my long, sad saga of strawberry hulling. I've used knives, different tong-style strawberry hullers, my fingers, etc.

When I saw the new Chef'N Stem Gem at Sur La Table, I thought it looked neat. I pressed the little green handle and watched those silver claws open and close.

But really, I thought, I have a perfectly nice paring knife, a drawer full of kitchen gadgets, and a budget. I didn't NEED it. It wasn't on sale, I didn't have a coupon, I moved on.

Then my sister came to visit, and brought me one. We went to a local farmers market, bought a box of strawberries, and got to work.

To operate the Stem Gem, you press the the green thing on top, which causes the metal jaws to open. You drive the metal jaws into the top of the strawberry, release the green thing, and with a little twist and pull up, the green leafy part of the strawberry as well as the white inside stem are trapped in those metal jaws. Push the green button again, and the stem is in your trash and the strawberry is ready to eat.

The finished strawberry looks nice and would be easy to stuff. I went through a pint of strawberries very quickly. There's really no waste, it's painless, and I haven't injured myself with it yet!

The only downside is that sometimes you have to fleck a little of the strawberry leaf away - it gets cut and then just sits on the strawberry. A final rinse after hulling would probably take care of this issue.

If you're a frequent strawberry eater, and want a quick and easy way to get rid of the stem, you may want to ask your sister to get you one too!

Disclaimer: Unfortunately, Chef'N doesn't know who I am, doesn't pay me to review their stuff, and doesn't even send me free gadgets. A girl can dream...

Wednesday, June 23, 2010

Chicken Caesar Lasagna

Hi, I'm Sally and I'm new here.

I love to cook, eat, and shop at Sur La Table. I'm a vegetarian but my husband and 18 month old son are not; healthy food is important but taste is paramount; and I'm kind of cheap but will splurge (see philosophy on taste, previous). Quick food is great, but sometimes a great meal will take time and that's ok too... on special occasions. I'm not a good photographer but I love to see what food looks like.

Alison asked me to join after traveling all the way to California and having dinner at my house. Since she liked it, I think I'll lead off with it here.

Chicken Caesar Lasagna
Better Homes & Gardens: http://www.bhg.com/recipe/pasta/chicken-caesar-lasagna/
Chicken Caesar Lasagna

Prep: 35 minutes
Bake: 50 minutes
Stand: 15 minutes
Ingredients
  • 9 dried whole wheat or regular lasagna noodles [NB: I love no bake lasagna noodles!]
  • 2 10-oz. containers refrigerated light Alfredo sauce [If you're cheap, jars work too!]
  • 3 Tbsp. lemon juice
  • 1/2 tsp. cracked black pepper
  • 3 cups chopped, cooked chicken breast*[You can use leftovers, skip this, or use fake chicken, too]
  • 1 10-oz. pkg. frozen chopped spinach, thawed and well drained [I used fresh]
  • 1 cup bottled roasted red sweet peppers, drained and chopped
  • 3/4 cup shredded Italian blend cheese [You can just shred some mozzarella and Parmesan together - I used about a cup or so]

Directions

1. Preheat oven to 325 degrees F. Cook noodles according to package directions. Drain; rinse with cold water; drain again. Meanwhile, in a bowl combine Alfredo sauce, lemon juice, and black pepper. Stir in chicken, spinach, and red peppers.

2. Lightly coat a 13x9x2-inch baking dish or 3-quart rectangular casserole with nonstick cooking spray. Arrange 3 noodles in bottom of dish. Top with one-third chicken mixture. Repeat layers twice. Cover; bake for 45 to 55 minutes or until heated through. Uncover; sprinkle with cheese. Bake, uncovered, 5 minutes more or until cheese is melted. Let stand 15 minutes before serving. Makes 9 servings. [I just baked it uncovered for about 35-40 minutes]

3. *Note: For chopped cooked chicken, season 2 pounds raw skinless boneless chicken breast halves with 1/4 teaspoon salt and 1/8 teaspoon ground black pepper. Heat 1 tablespoon olive oil in skillet over medium-high heat. Reduce heat to medium. Add chicken. Cook, uncovered, 8 to 12 minutes or until no longer pink, turning halfway through cooking. Cool chicken slightly before chopping.

Nutrition Facts: Calories 268, Total Fat (g) 10, Saturated Fat (g) 6, Cholesterol (mg) 68, Sodium (mg) 557, Carbohydrate (g) 20, Total sugar (g) 3, Fiber (g) 2, Protein (g) 24, Vitamin C (DV%) 83, Calcium (DV%) 21, Iron (DV%) 8.

I also made Pioneer Woman's Rosemary Rolls and Roasted Carrots (with rosemary instead of thyme, since I was already using rosemary) and some Fresh Express Caesar Supreme and Mediterranean Supreme salads (they were on sale!) I'll get into PW's recipes in later posts...